
A guide is only as good as the data it was designed from, and most of the cases that come back for a re-scan were lost at the chair rather than at the workstation. This page is what to capture and how to send it.
Two disciplines, two answers. An implant case is decided by the CBCT and by how the optical data is tied to it, and there are five accepted ways of doing that. An orthodontic case is decided by the models; a CBCT is welcome and sometimes decisive, but it is optional, and a face scan is an addition rather than a requirement.
Except for radiographic guides and dentures, GuideMia does not require or endorse scanning appliances, trays or help bodies of any kind. If your laboratory has made something special, ask before you scan a patient with it.
Dental implant software cases
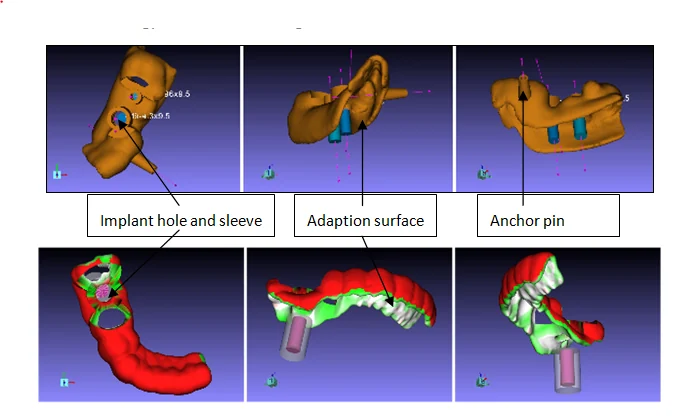 What all this data has to produce: an adaption surface that fits the patient, drilling holes with sleeves, and optional anchor pins and irrigation windows.
Choosing the protocol
| Protocol | Guide it produces | Use it when |
|---|---|---|
| CBCT + intraoral scan | Tooth or gum level | Partially edentulous with good tooth support, and no crowns, implants or other metal near the implant sites — or at least two complete tooth surfaces that the scatter will not reach |
| CBCT + optical scan of a stone model | Tooth or gum level | The same indications, where the practice does not scan chairside |
| Dual scan with a radiographic guide or denture | Tooth or tissue level | Fully or partially edentulous, and the one protocol that tolerates crowns, implants and other artefacts close to the implant sites |
| Dual CBCT scan with a stone model | Tooth or gum level | Partially edentulous with good tooth support, where an optical scanner is not available |
| Single CBCT scan | Bone or tooth level | Fully or partially edentulous, planned on bone. Partially edentulous cases still need good tooth support; a fully edentulous case with very loose bone is not a candidate |
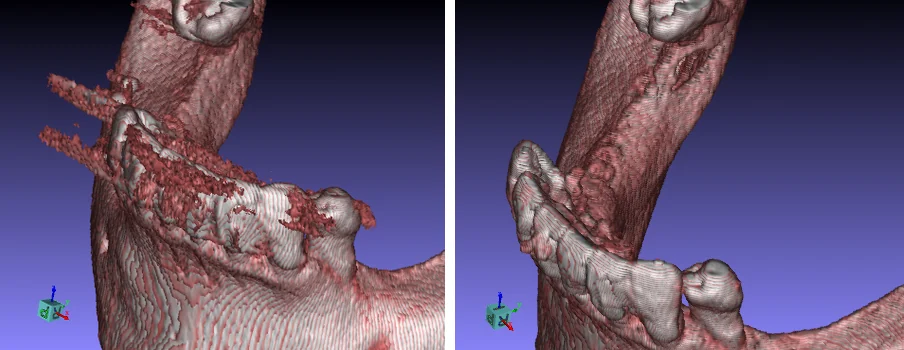 Scatter from metal, handled automatically. How much of it a case carries is what pushes the choice toward one protocol or another.
Preparing the patient
These five items apply to every protocol that scans a patient.
- Remove all metal prostheses, and any metal jewellery that could reach the region being scanned.
- Secure the bite with cotton pads or another highly radio-translucent material such as polyethylene. Do not use anything radio-opaque: it will stop the tooth surfaces being segmented out of the CBCT.
- The upper and lower teeth must not touch during the scan.
- Leave 5 to 10 mm between the jaws.
- The patient must stay still and must not swallow while the scan is being acquired.
Taking the CBCT
Set the occlusal plane parallel to the image slices, with no tilt, and set the height so the occlusal plane sits in the centre of the field of view. If both arches are being treated, scan each arch separately.
Slice thickness of 0.2 to 0.5 mm is what the planning software is built for. Thinner slices are supported and will ask more of the workstation. For the reconstruction settings themselves, ask the scanner's technical support: they vary by machine and GuideMia does not override them.
Send the DICOM files as the scanner wrote them.
Intraoral scan
- Scan the preparation area, and preferably the full arch.
- Follow the scanner manual for the settings.
- Keep 3 to 5 mm of margin beyond the tooth surfaces.
- Where several units justify a virtual tooth setup, place the teeth in the scanner software or in CAD and save the diagnostic model as a separate STL file.
- For immediate extraction cases, remove the tooth that is coming out — the crown, not the root area — in the scanner software or in CAD, and save that as a separate STL file.
- Steps 4 and 5 can be combined in one model.
- Scan the antagonist as well. It matters for the restoration and for the implant plan.
Trim the scan along the edges if the scanner software can, but keep the margin above. Inspect the model for overlaps, self-intersections and holes if you have a way to. STL files between 5 and 20 MB are the usual range and are accepted without comment.
Optical scan of a stone model
Same margins and the same settings discipline as the intraoral scan. Scan the model first, then:
- For a tooth setup, either add the teeth to the physical model and scan it again, or place them virtually and save a separate STL.
- For immediate extraction cases, either remove the tooth from the stone model and take an extra scan, or remove it virtually and save a separate STL.
- Scan the antagonist.
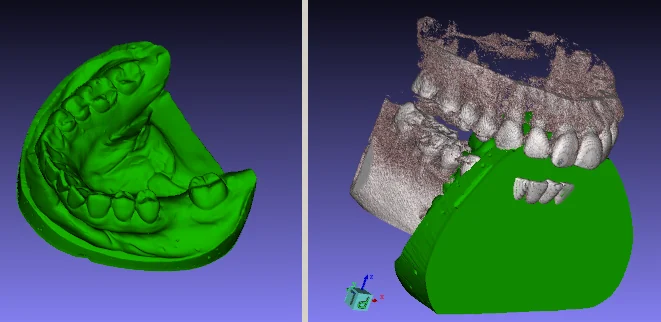 A stone model or intraoral scan brought into the case and registered against the CBCT.
Dual scan with a radiographic guide or denture
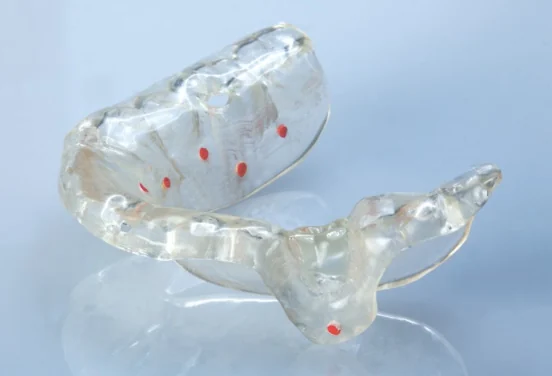 Radiographic guides made the way this protocol wants them: no metal, flanges wide enough for markers, and the markers themselves spherical and unevenly placed.
This is the protocol for a fully edentulous case, and the only one that survives a mouth full of artefact. A case run this way succeeds or fails on the guide, so build it carefully.
Making the radiographic guide
- Design it with a prototype of the restoration:
- teeth properly chosen and placed;
- no metal and no other radio-opaque component or material;
- 2.5 to 4 mm thick;
- buccal flanges extended enough to carry the radiographic markers and the anchor pins;
- a proper fit on the patient's anatomy.
- Add the radiographic markers. Gutta-percha, radio-opaque glass beads or similar:
- 6 to 8 markers;
- 1.5 to 2.5 mm, spherical — not cylindrical, and no special geometry;
- half on the lingual side and half on the buccal;
- do not distribute them evenly.
- Make a bite registration in a radio-translucent material.
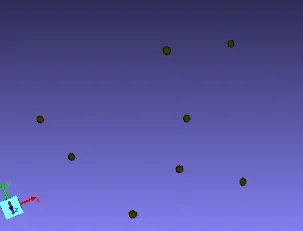 The markers extracted from the scan template. Six to eight, spherical, unevenly placed — this is the pattern the software matches.
Using an existing denture
Examine it first. It can serve as the radiographic guide if the teeth are of proper size, shape and length; the occlusion is well established; the buccal flanges are wide enough for gutta-percha markers and retentive pins; it is hard-relined only; it fits the soft tissue and the cast closely; and it contains no metal or other radio-opaque material. Markers go on exactly as above.
The two scans
Seat the guide properly and firmly and have the patient bite into the registration. Take one CBCT of the patient wearing the radiographic guide, and a second CBCT of the radiographic guide alone. Send both DICOM sets.
The markers are found, extracted and matched automatically, including in scans carrying heavy scatter, and the orientation the scan happens to be in does not matter.
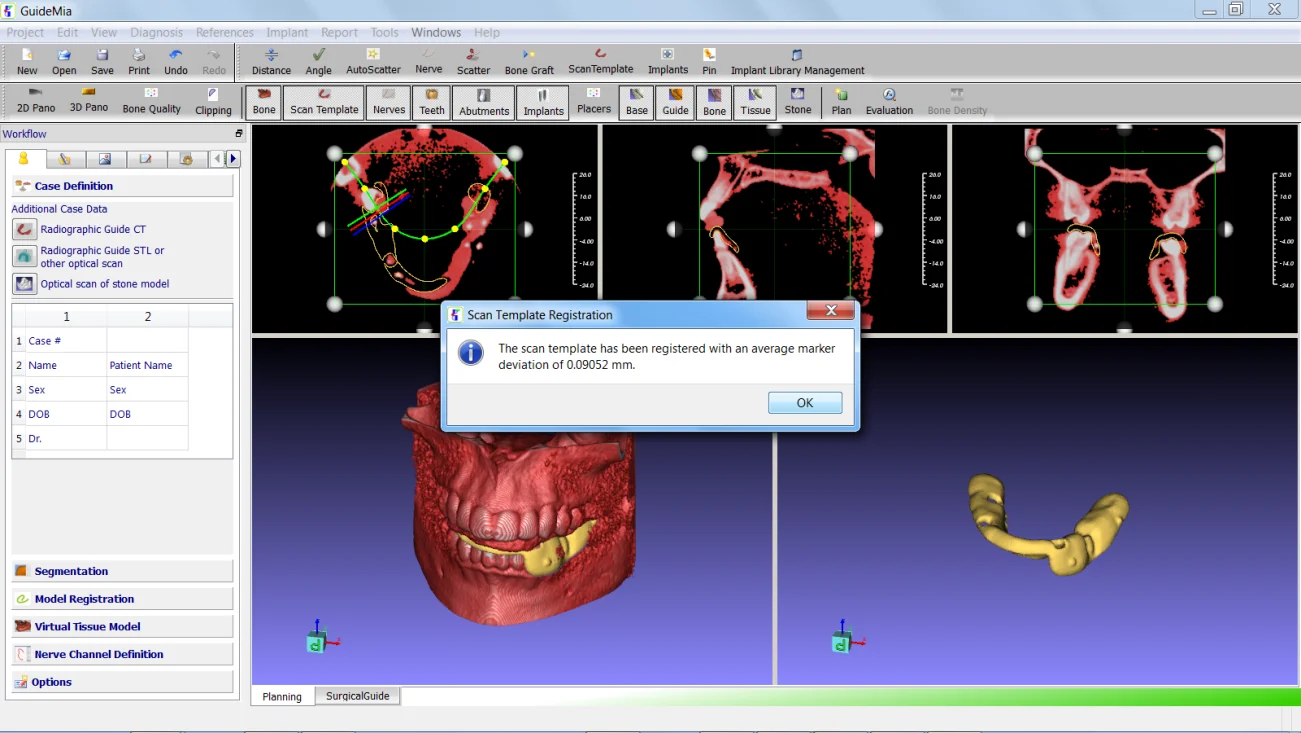 The radiographic guide registered with the patient scan automatically. The message box reports the average deviation between the markers on the two scans.
Dual CBCT scan with a stone model
Patient preparation and patient scanning are the same as for the CBCT plus intraoral scan protocol. For the model:
- Scan it in a position close to the one it occupied during the patient scan.
- Support it on a highly radio-translucent material.
- Put no supporting material on the tooth surfaces.
- Slice thickness 0.2 to 0.5 mm, as for the patient.
Send both DICOM sets.
Single CBCT scan
Patient preparation and patient scanning are the same as for the CBCT plus intraoral scan protocol. There is no second dataset — the plan and the guide are built from the bone.
Orthodontic cases
An orthodontic case does not start from the CBCT. It starts from the arches.
What a case needs
| Data | Status | Why |
|---|---|---|
| Intraoral scan or model scan | Required | Both arches and the bite. Everything the staging moves is segmented from this. |
| CBCT (DICOM) | Optional | Roots, alveolar bone limits, impacted teeth, a skeletal question. Without it the crowns still move; with it you can see what the roots do. |
| Face scan | Additional | Smile design, and checking the setup against the facial midline and the smile line. |
| Photographs and radiographs | Recommended | The diagnostic record, and what the patient is actually shown. |
Intraoral or model scan
This is the one input every orthodontic case needs, and it has to be complete.
- Scan both arches in full, plus the bite in occlusion. A quadrant is not an orthodontic case.
- Include 3 to 5 mm of soft tissue beyond the gingival margins. The staging needs somewhere to put attachments and the aligner needs somewhere to end.
- Capture the interproximal areas as well as the scanner allows. Contacts that are guessed at become interproximal reduction that is guessed at.
- Do not trim the tissue away.
- Send STL, PLY or OBJ. The usual range is 5 to 20 MB per arch.
For a stone model, the same rules apply; scan the casts articulated or send the bite separately.
CBCT, when the case calls for it
Bring a CBCT when the plan depends on something the crowns cannot tell you: root position and length, how much alveolar bone there is to move into, an impacted or ectopic tooth, resorption, or a skeletal discrepancy you are deciding surgery on.
Patient preparation is the implant preparation above, with one difference that matters: for an orthodontic scan the teeth are normally scanned in occlusion, because the bite is part of the diagnosis. Say which you did when you send the case.
Slice thickness of 0.2 to 0.5 mm, and the field of view has to include what you are asking about — a full-arch field for root positions, a larger field if the question is skeletal.
Face scan
Additional, never required. Send it when the setup is going to be judged against the face: a smile line that the arch alone will not give you, a facial midline that does not agree with the dental one, or a case that ends in restorative work.
Scan it with the patient in a repeatable position, and capture a relaxed pose and a smile if the scanner allows both.
What to send
Both arches and the bite as STL, PLY or OBJ; the CBCT as DICOM if you took one; the face scan if you took one; photographs and radiographs as ordinary image files. Name the files so the arch and the pose are obvious — a folder of unnamed meshes costs more time to sort out than it took to export.
If you are not sure
Send the case and ask before you scan the patient a second time. It is quicker for everyone, and the answer is usually that what you already have is enough.